这个原声吉他录音课程大纲非常专业和系统,涵盖了从前期准备到后期混音的完整工作流。下面我根据您提供的框架,结合可靠的录音知识,将这个大纲整理成一个更清晰、可直接使用的课程目录,并补充一些实用的细节。
这个课程结构旨在解决家庭录音中最实际的问题,并致力于帮助学习者用有限的设备获得专业的声音。
🎸 课程模块与核心内容
| 课程模块 | 核心内容与技能要点 |
|---|---|
| 一、录音前的准备:心态与设置 | 确立“在源头获得好声音”的理念;优化表演技巧(拨片/指弹动态控制);评估并选择最佳录音空间。 |
| 二、核心工具:麦克风的选择与运用 | 掌握 condenser(电容)、ribbon(铝带)、dynamic(动圈)麦克风的特性与适用场景;为现有设备匹配最佳麦克风。 |
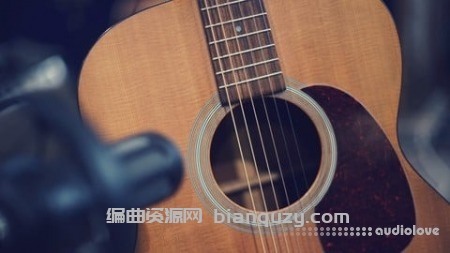
| 三、实战录音技巧:麦克风摆放 | 学习单支/双支麦克风的基本摆放技巧(如XY、ORTF、AB制式);在非理想声学环境中获得平衡、自然的声音。 |
| 四、叠加与双层录音 | 学习通过演奏技巧和声像摆位创造宽度与深度;避免声音杂乱,实现丰满而清晰的多吉他编曲。 |
| 五、混音入门:塑造完美音色 | 使用EQ做减法清理频率,用压缩控制动态;了解Pultec式EQ的染色特性;运用饱和度为音色增添温暖感。 |
| 六、混音进阶:空间感营造 | 根据歌曲风格选择混响类型(Room, Plate, Hall, Spring);设置预延迟和衰减时间,让吉他自然融入混音。 |
💡 关键技术点详解
除了表格中的核心框架,以下几个关键点能帮助学员更好地掌握精髓:
- 优化表演与空间:课程会深入讲解如何通过细微的演奏调整(如拨片角度、触弦力度)来从根本上改善音色。同时,会传授在普通房间里通过寻找“最佳点位”(如房间中心、角落)和使用毛毯、沙发等日常物品来有效抑制不良反射,获得更干净的音轨。
- 麦克风摆放的细节:这是课程的核心。您将不仅学习各种制式,还会理解其背后的原理。例如,如何通过细微调整麦克风与音孔的距离和角度来平衡低频的丰满度与高频的清晰度,避免“boomy”或“harsh”的问题。课程还会演示如何将大振膜电容麦的细腻与动圈麦的结实感相结合,通过相位对齐技巧,获得更全面的声音。
- 创造性的叠加技巧:双层录音(Double-tracking)是让原声吉他变得丰满有力的秘诀。课程将指导您如何通过变换和弦按法、演奏节奏甚至使用不同材质的拨片来录制两条有细微差异的声部,从而在声像上一左一右摆开后,产生迷人的立体声宽度和厚度,而不仅仅是简单的复制粘贴。
🎧 混音与母带处理要点
在混音阶段,课程将采用“减法”和“塑造”并重的思路:
- 精准的EQ与压缩:首先使用高通滤波器(High-pass Filter) 切掉不必要的超低频噪音(如80-100Hz以下)。然后,会演示如何用窄带宽(Q值) 在易产生浑浊的200-300Hz附近做适当衰减,并用宽带宽在3-5kHz提升指弹的“清晰度”或10kHz以上增加“空气感”。压缩方面,会讲解如何设置启动时间(Attack)和释放时间(Release),既控制动态又保留演奏的活生感。
- 混响的空间营造:课程将解释不同混响类型的特性:板式混响(Plate) 明亮光滑,适合现代流行;大厅混响(Hall) 空间感强,适合大气作品;房间混响(Room) 自然亲切;弹簧混响(Spring) 个性十足。您将学习如何设置预延迟(Pre-delay) 让干声更突出,以及如何通过EQ只对混响的高频或低频进行处理,避免声音浑浊。
Boomy lows, harsh highs, lifeless DI tracks, rooms that sound terrible on mic – most of the time, the problem isn’t your gear, it’s the decisions you make before and during recording.
In this short, focused course, I’ll walk you through a practical, real‑world approach to recording acoustic guitars that actually sound musical and mix‑ready, whether you’re working in a home studio or a professional space.
Drawing on nearly two decades of producing and recording artists, I’ll show you how to get better results from the gear you already have – without relying on endless plugins or complicated setups.
By the end of this course, you’ll be able to:
- Plan your recordings so you’re not “fixing it in the mix” later
- Choose the right playing style (pick vs. fingers) and control your dynamics for a more consistent, professional sound
- Make the most of an untreated room by finding the best recording spot and minimising unwanted reflections
- Understand the differences between condenser, ribbon and dynamic microphones and pick the right type for your guitar and space
- Use practical mic placements (single‑mic, dual‑mic and simple stereo techniques) to capture a balanced, natural tone
- Layer and double‑track acoustic guitars to create width, depth and richness without cluttering the arrangement
- Shape your sound in the mix with EQ (including Pultec‑style tone shaping), compression and gentle saturation
- Choose and dial in different reverb types (room, plate, hall, spring) so your acoustic sits naturally in the mix
Who this course is for
- Home producers and songwriters who want their acoustic tracks to sound more like “records” and less like rough demos
- Musicians who mainly work in the box and want to start using mics and rooms more effectively
- Intermediate users who understand the basics of recording but struggle to get consistent acoustic guitar results
- Anyone who wants a clear, step by step framework instead of random YouTube tips
The course is split into short, focused lessons you can watch in one sitting or dip into as needed:
- Setting the mindset and expectations for recording acoustic guitar
- Preparing your performance and choosing the right space
- Understanding microphone types and how they affect your sound
- Practical mic placement techniques that work in real rooms
- Layering strategies for bigger, wider and more interesting guitar parts
- Mixing essentials: EQ, Pultec‑style tone shaping, compression and saturation
- Reverb choices and settings to place your guitar in the right space
- Final thoughts and next steps to keep improving your recordings
You don’t need expensive gear to benefit from this course – just a DAW, at least one microphone, and a willingness to experiment.
If you’re ready to make your acoustic guitar recordings clearer, more musical and more professional, enrol now and let’s get started.

.png)

![母带处理完全解析 Groove3 Cubase Mastering Explained [TUTORiAL]](http://www.bianquzy.com/wp-content/uploads/2025/12/Groove3-Cubase-Mastering-Explained-TUTORiAL.jpg)
![歌曲创作解析:卡姆《哈利路亚》MixWithTheMasters Journey of a Song: ‘Hallelujah’ by Cam [TUTORiAL]](http://www.bianquzy.com/wp-content/uploads/2025/12/MixWithTheMasters-Journey-of-a-Song-Hallelujah-by-Cam-TUTORiAL.jpg)
![人工智能音乐营销与音乐推广入门:打造粉丝社群 [教程] Udemy AI Music Marketing and Music Promotion 101: Build A Fanbase [TUTORiAL]](http://www.bianquzy.com/wp-content/uploads/2025/12/Udemy-AI-Music-Marketing-and-Music-Promotion-101-Build-A-Fanbase-TUTORiAL.jpg)